作为初学者,虽然深知不可一步登天也应当脚踏实地,但是总会有一些奇思异想想要去实现。在实现第一个app的时候我们遇到的另一个头疼的问题便是如何实现像微信5.0版本过后的滑动效果,查阅官方文档以及借鉴网上大神的经验之后我们也顺利得到了一点思路。虽然我另外一个伙伴已经实现了此功能,但我总觉得有些许的冗杂,经过研究学习之后现在已经得到了优化,详见下文。
1、关于android.support.v4
google提供了Android Support Library package 系列的包来保证来高版本sdk开发的向下兼容性,其中v4包是为了照顾1.6及更高版本而设计的,这个包是使用最广泛的,eclipse新建工程时,都默认带有了。但是我一开始在开发中一直指不到该包的源代码,一番搜索之后找到了解决方法:1、首先为工程build path,找到路径:android-sdk-windows\extras\android\support\v4\android-support-v4.jar;2、导入该包并不能正确的找到源代码,需要在java bulid path –>Order and Export下找到刚刚导入的support\v4\android-support-v4.jar,并将其选择到top位置;3、点击apply之后就可以顺利的查到源代码。
该包下比较常用的类有Fragment以及ViewPager,我的伙伴在实现该功能时使用的是Fragment+ViewPager,这也是官方一直推荐的,但是因为觉得有些许的冗杂,所以这里我只是用ViewPager来实现。关于该包下的这两个常用的类以及其他关键的UI效果的类大家可以查看文档了解,这里就不赘述。
2、具体实现
为了美观,这里只显示关键代码,工程的整体代码可以到我的博客中下载:
1
2
3
4
5
6
7
8
9
10
11
12
13
14
15
16
17
18
19
20
21
22
23
24
25
26
27
28
29
30
31
32
33
34
35
36
37
38
39
40
41
42
43
44
45
46
47
48
49
50
51
52
53
54
55
56
| public Object instantiateItem(ViewGroup container, int position) {
if (mViewList.get(position).getParent() != null) {
container.removeView(mViewList.get(position));
}
container.addView(mViewList.get(position));
return mViewList.get(position);
}
@Override
public void destroyItem(ViewGroup container, int position, Object object) {
container.removeView(mViewList.get(position));
}
@Override
public int getCount() {
return mViewList.size();
}
});
mViewPager.setOnPageChangeListener(new OnPageChangeListener() {
public void onPageScrolled(int position, float positionOffset, int positionOffsetPixels){
int x = (int)((position + positionOffset) * mTextView.getWidth());
((View)mTextView.getParent()).scrollTo(-x, mTextView.getScrollY());
}
public void onPageSelected(int position){
if(position == 0){
radioButton1.setChecked(true);
}else if(position == 1){
radioButton2.setChecked(true);
}else if(position == 2){
radioButton3.setChecked(true);
}else if(position == 3){
radioButton4.setChecked(true);
}
}
public void onPageScrollStateChanged(int state){
}
});
}
int tmpState = 0;
public int dip2px(float dipValue) {
final float scale = getResources().getDisplayMetrics().density;
return (int) (dipValue * scale + 0.5f);
}
public int px2dip(float pxValue) {
final float scale = getResources().getDisplayMetrics().density;
return (int) (pxValue / scale + 0.5f);
}
|
1
2
3
4
5
6
7
8
9
10
11
12
13
14
15
16
17
18
19
20
21
22
23
24
25
26
27
28
29
30
31
32
33
34
35
36
37
38
39
40
41
42
43
44
45
46
47
48
49
50
51
52
53
54
55
56
57
58
59
60
| <LinearLayout xmlns:android="http://schemas.android.com/apk/res/android"
xmlns:tools="http://schemas.android.com/tools"
android:layout_width="match_parent"
android:layout_height="match_parent"
android:background="#FFFFFFFF"
android:orientation="vertical" >
<RadioGroup
android:id="@+id/radioGroup"
android:layout_width="match_parent"
android:layout_height="wrap_content"
android:gravity="center"
android:orientation="horizontal" >
<RadioButton
android:id="@+id/radioButton1"
style="@style/radioButtonStyle"
android:text="页面1" />
<RadioButton
android:id="@+id/radioButton2"
style="@style/radioButtonStyle"
android:text="页面2" />
<RadioButton
android:id="@+id/radioButton3"
style="@style/radioButtonStyle"
android:text="页面3" />
<RadioButton
android:id="@+id/radioButton4"
style="@style/radioButtonStyle"
android:text="页面4" />
</RadioGroup>
<LinearLayout
android:layout_width="match_parent"
android:layout_height="3dip"
android:orientation="horizontal" >
<TextView
android:id="@+id/textView"
android:layout_width="200dip"
android:layout_height="3dip"
android:background="#FF336699"
android:textColor="#FFFF0000" />
</LinearLayout>
<View
android:layout_width="wrap_content"
android:layout_height="1dip"
android:background="#FF336699" />
<android.support.v4.view.ViewPager
android:id="@+id/viewPager"
android:layout_width="match_parent"
android:layout_height="match_parent" >
</android.support.v4.view.ViewPager>
</LinearLayout>
|
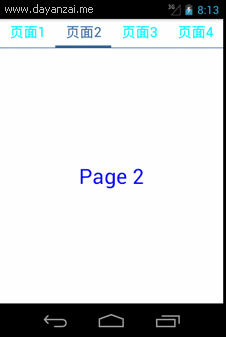
3、具体效果
运行截图