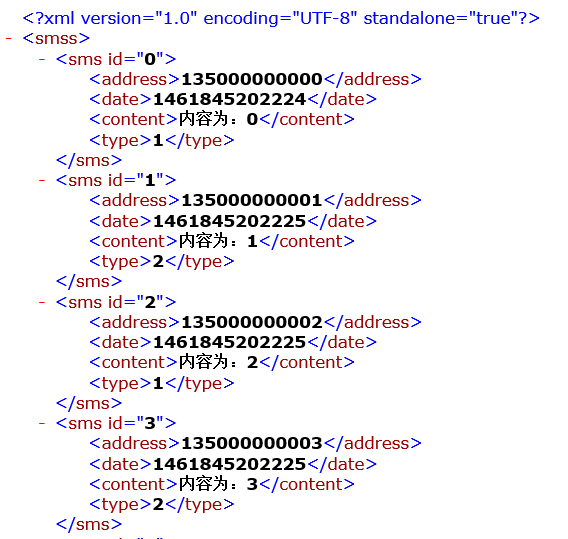
还记得上一篇我们讲到了用SharePreference来存储数据,那么究竟它是如何实现的呢,今天我们就来仔细看看其实现的细节,我们给它一个准确的名字,叫做XML序列化器(XmlSerializer)。
不同于上面一篇的保存用户的登录名以及密码,这次我们保存设备中的信息,但是由于现在知识有限,我还不能够实现对设备中信息的读取,那么我就在程序中自己生成若干条信息,对这些生成的信息进行读取,并保存到位于SD卡的backup.xml文件中。在这里我是用两种方法对其进行存储并比较两种方法的优缺点,当然作为开发,我更建议使用待会讲到的第二种方法。
先来看看我们需要做到什么样的效果:
1、使用StringBuffer,将所有的内容逐一追加到该字符流中。
1 | public void backUpSms1(View view){ |
第一种方法相当简单,只是用了一个字符流,将所有的内容逐一追加就行了,可是当我们的短信中出现了一些比较特殊的字符,例如:”<”或者是”>”那么在读取并写入到xml文件的时候就会出错,这个时候打开该xml文件的时候将会报错;另外当我们需要在sms标签中加入一些属性,如图一所示,那么这个时候仅仅利用字符流来写就会变得冗杂,而且逻辑关系就不严谨了,所以这个时候我们就需要用到第二种方法了。
2、XML序列化器(使用XmlSerializer编辑xml文件)【推荐】
1 | public void backUpSms2(View view) { |
使用XmlSerializer的时候有几个步骤:
1、首先需要找到输出流,即通过setOutput方法将输出流以及编码格式传入;
2、接着需要声明文件以及结束声明,这是通过startDocument以及endDocument这两个方法来实现的;
3、接着就可以通过startTag以及startTag方法来声明标签以及结束标签,要声明标签的内容的时候可以通过text方法,当然这个方法只能允许传入String类型,所以对于其他数据类型,需要先对其进行转换;
4、最后一点就是上面讲到的——要在标签中添加属性,那就需要通过attribute方法声明id属性。
通过以上的讲解,我们可以得到以下的xml文件:
-<smss>
-<sms id="0">
<address>135000000000</address>
<date>1461845202224</date>
<content>内容为:0</content>
<type>1</type>
</sms>
-<sms id="1">
<address>135000000001</address>
<date>1461845202225</date>
<content>内容为:1</content>
<type>2</type>
</sms>
-<sms id="2">
<address>135000000002</address>
<date>1461845202225</date>
<content>内容为:2</content>
<type>1</type>
</sms>
-<sms id="3">
<address>135000000003</address>
<date>1461845202225</date>
<content>内容为:3</content>
<type>2</type>
</sms>
-<sms id="4">
<address>135000000004</address>
<date>1461845202225</date>
<content>内容为:4</content>
<type>2</type>
</sms>
-<sms id="5">
<address>135000000005</address>
<date>1461845202225</date>
<content>内容为:5</content>
<type>2</type>
</sms>
-<sms id="6">
<address>135000000006</address>
<date>1461845202225</date>
<content>内容为:6</content>
<type>2</type>
</sms>
-<sms id="7">
<address>135000000007</address>
<date>1461845202225</date>
<content>内容为:7</content>
<type>2</type>
</sms>
-<sms id="8">
<address>135000000008</address>
<date>1461845202225</date>
<content>内容为:8</content>
<type>1</type>
</sms>
-<sms id="9">
<address>135000000009</address>
<date>1461845202225</date>
<content>内容为:9</content>
<type>2</type>
</sms>
-<sms id="10">
<address>135000000010</address>
<date>1461845202225</date>
<content>内容为:10</content>
<type>1</type>
</sms>
-<sms id="11">
<address>135000000011</address>
<date>1461845202225</date>
<content>内容为:11</content>
<type>2</type>
</sms>
-<sms id="12">
<address>135000000012</address>
<date>1461845202225</date>
<content>内容为:12</content>
<type>2</type>
</sms>
-<sms id="13">
<address>135000000013</address>
<date>1461845202225</date>
<content>内容为:13</content>
<type>2</type>
</sms>
-<sms id="14">
<address>135000000014</address>
<date>1461845202225</date>
<content>内容为:14</content>
<type>2</type>
</sms>
-<sms id="15">
<address>135000000015</address>
<date>1461845202225</date>
<content>内容为:15</content>
<type>1</type>
</sms>
-<sms id="16">
<address>135000000016</address>
<date>1461845202225</date>
<content>内容为:16</content>
<type>1</type>
</sms>
-<sms id="17">
<address>135000000017</address>
<date>1461845202225</date>
<content>内容为:17</content>
<type>1</type>
</sms>
-<sms id="18">
<address>135000000018</address>
<date>1461845202225</date>
<content>内容为:18</content>
<type>2</type>
</sms>
-<sms id="19">
<address>135000000019</address>
<date>1461845202225</date>
<content>内容为:19</content>
<type>1</type>
</sms>
</smss>
